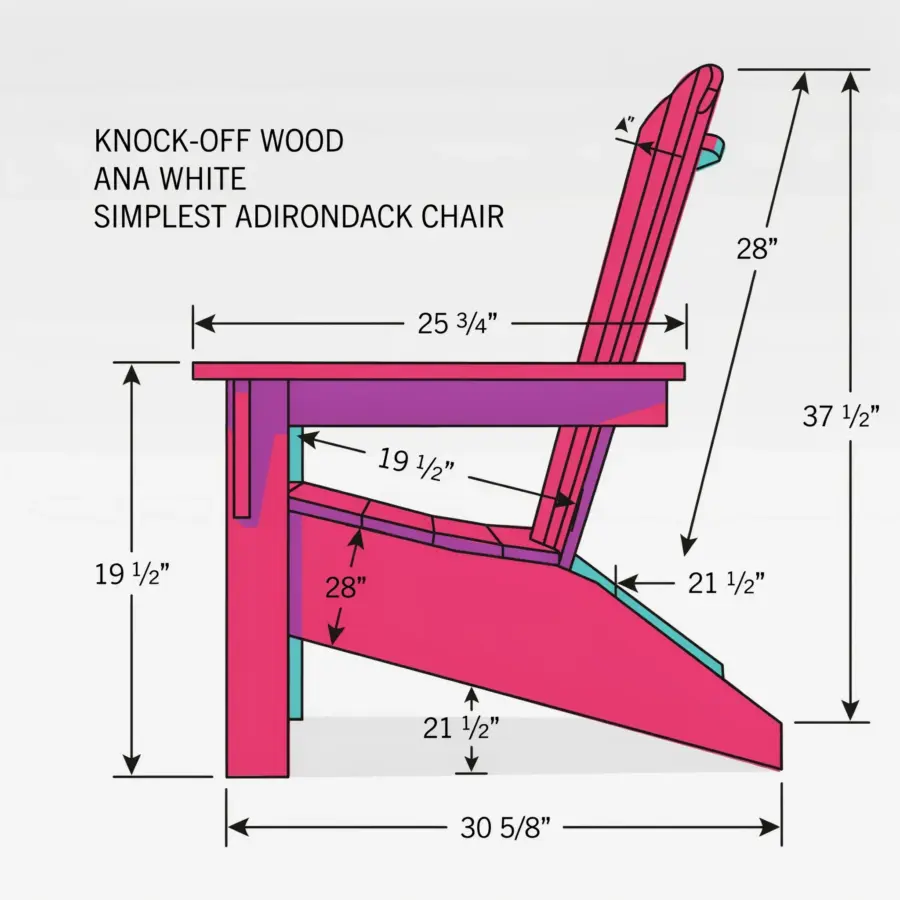
Spring is finally here and my patio is begging for a refresh. But have you seen the price of outdoor furniture lately? A single wooden Adirondack chair can cost $150 or more at big box stores. That is why I spent last weekend testing out several Adirondack chair DIY plans to prove you can build a sturdy, classic chair for under $50. I will walk you through the exact build I used, including where to save money and where to spend a few extra cents for durability.
Choosing Affordable Lumber for Your Adirondack Chair
The biggest cost in any woodworking project is the wood itself. For a chair that lives outside, pressure treated pine is your best budget friend. A single 2x4x8 and a couple of 1x4x8 boards from the home center will run you about $25 to $30 total.
Look for boards that are straight with no major cracks. If you want a smoother finish without spending extra, you can sand pressure treated wood after it dries for a few days. Just wear a dust mask and gloves because the treatment chemicals can irritate your skin.
Complete Materials and Tools List
Here is exactly what you need to build one chair. I bought everything at my local lumber yard and hardware store for $38.
- One 2x4x8 board (cut for legs and arm supports)
- Three 1x4x8 boards (for seat slats, back slats, and arms)
- One 1x2x8 board (for the back support cross piece)
- Deck screws: 2.5 inch and 1.5 inch lengths (I used exterior grade)
- Wood glue (waterproof, like Titebond III)
- Pencil, tape measure, circular saw or miter saw, drill, sandpaper
- Outdoor wood finish (optional, adds longevity)
Total cost: around $30 to $50 depending on your local lumber prices and whether you already own screws and glue. Compared to store bought chairs, you save at least 60 percent.
Step by Step Cutting Guide for DIY Adirondack Chairs
This is the part where most beginners get nervous, but I promise it is simple. Print out a basic cutting diagram from a free online plan (I used Rogue Engineer’s version, but any standard plan works). The key cuts are:
From the 2×4, cut two leg pieces (about 20 inches long) and two arm supports (10 inches each). From the 1×4 boards, cut seven seat slats at 20 inches each, six back slats at 30 inches each, and two arm pieces at 22 inches each. The 1×2 board becomes a cross piece at 16 inches.
Take your time with each cut. Mark your measurements clearly and double check before you pull the trigger on the saw. A slightly crooked cut can be fixed with sandpaper, but it is easier to measure twice.
Assembling the Seat and Back Slats
Start with the frame. Attach the 2×4 leg pieces to the arm supports using 2.5 inch screws and wood glue. Then lay out your seat slats on top of the frame, leaving about a quarter inch gap between each slat for water drainage. Pre drill holes to prevent splitting and screw them down.
The back slats attach to a curved support piece. If your plan calls for a curved back, cut a gentle curve from a scrap 1×4 and screw the slats into it. Space them evenly about half an inch apart. This part gives the chair its iconic look and makes it comfortable to lean back.
I found it helped to clamp the whole assembly together before driving screws. That way nothing shifted while I worked. Total assembly time for me was about three hours, including sanding.
Budget Friendly Finishing Options
You can leave the chair raw if you want a natural weathered look. Pressure treated pine will turn gray over time, but it will last a few years without any coating. If you prefer color, grab a quart of exterior latex paint or a clear outdoor sealant. That adds about $10 to $15 to your total.
I used a sample size of semi transparent stain in a cedar tone. It only cost $8 and covered two chairs with a thin coat. Apply with a foam brush or rag, let it dry for a day, and you are done. Do not use indoor paint or regular varnish because it will peel in the sun.
Customizing Your Homemade Outdoor Chair
One of the best parts of building your own furniture is making it your own. You can widen the seat slats for a roomier chair, add a cup holder by cutting a hole in the arm, or paint it a bold color like navy or forest green.
If you want to match a specific patio set, buy a small sample of exterior paint and test it on a scrap piece first. I added a curved back for extra comfort by tracing a dinner plate and cutting the curve with a jigsaw. That customization cost zero extra dollars but made the chair much nicer to sit in.
Leave a Comment