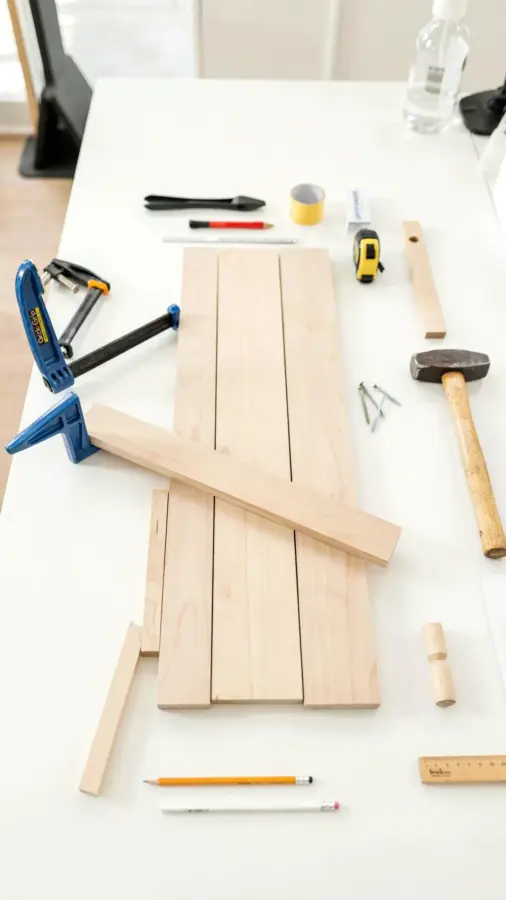
Last Sunday afternoon, I found myself staring at a single scrap piece of oak, a new can of natural oil, and a wall in our living room that had felt empty for months. That moment was the start of my first serious attempt at woodworking, and it completely changed how I see our home. This beginner woodworking project was nothing more than a floating shelf, but the process of making it, and the warm glow it now gives our reading nook, turned our cozy corner into the favorite spot in the house.
If you have ever felt intimidated by power tools or assumed that woodworking requires a massive workshop, I promise you are not alone. I had zero experience with saws or drills before this build. What I discovered is that a simple project like this is the perfect way to learn the basics of DIY, because it only uses one board, a few tools, and it can genuinely be finished in about an hour. It is the kind of project that proves a cozy home is built on effort and little details, not on expensive furniture.
Why a Floating Shelf is the Best Beginner Woodworking Project
Most DIY articles suggest starting with a planter box or a simple bench, but a floating shelf is easier for one specific reason: it hides your mistakes. Since the support mechanism is invisible once the shelf is mounted, you do not need to worry about perfect joinery or flawless edges. The focus is on cutting, sanding, and finishing, which are the exact skills you need to build confidence.
This project also fits the scrapwood projects category perfectly, meaning the cost is almost zero if you have a leftover piece of lumber. It instantly adds functional storage and a decorative layer to any room, which makes the payoff feel huge for the small amount of effort required. It is the true definition of a cozy home upgrade that does not require a contractor.
Essential Beginner Woodworking Tools You Actually Need
Before you start, let us clear up a common myth: you do not need a table saw, a planer, or a drill press for this build. A beginner setup is minimal, and you likely already own most of the items on this list. For this specific floating shelf, I used a hand saw and a drill, which are the two most versatile tools you can own.
Here is the exact shopping list I recommend for this project:
- Scrap wood: A solid piece of pine, oak, or poplar, roughly 24 inches long, 6 inches wide, and 1 inch thick.
- Hand saw or circular saw: A simple hand saw works fine for cutting the board to length.
- Sander or sandpaper: Medium grit (120) and fine grit (220) for a smooth finish.
- Drill with a hole saw attachment: This is used to recess the mounting screws into the wall.
- Spirit level: Essential for making sure the shelf hangs straight.
- Stud finder: A cheap magnetic one is enough to locate the wall studs.
- Natural oil finish: Tung oil or linseed oil works beautifully to bring out the wood grain.
How to Choose the Right Wood for a Cozy Home
The type of wood you choose completely changes the final look of your cozyhome aesthetic. If you want a light, airy Scandinavian vibe, go for pine or poplar. If you prefer a darker, richer feel that matches walnut furniture, then oak or even a piece of walnut scrap is ideal. I chose red oak because the grain is very pronounced, and it looks stunning with just a simple oil finish.
When you are looking through your scrap pile, check for warps or large cracks. You want a board that sits flat on a table, because a curved board will make a crooked shelf. Also, ensure it is a solid piece of wood and not plywood or MDF, as those do not take a natural oil finish as nicely and tend to look a bit flat in a cozy setting.
The Simple Steps to Cut and Sand Your Scrap Wood
Once you have your board, mark your cut line with a pencil and a speed square to guarantee a straight edge. Double check your measurement against the wall space where the shelf will live. It is much easier to make the board shorter now than to realize it is too long after you have already finished the surface.
Cut the board to size and then start sanding. Begin with the 120 grit sandpaper to remove any rough saw marks, then switch to the 220 grit to get that silky smooth texture. I usually sand in the direction of the grain, and I make sure to round over the sharp edges just a little bit with the paper. This bead of an edge makes the shelf look softer and more professional.
Apply a Natural Oil Finish to Bring Out the Warmth
This is the step where the magic happens in this beginner woodworking project. Wipe off the sanding dust with a tack cloth, then apply your natural oil with a clean, lint-free rag. You want to rub the oil into the surface with the grain, let it sit for about 15 minutes, and then wipe off the excess with a clean rag. This is called a wiping varnish technique, and it is forgiving.
One coat is usually enough for a scrap wood shelf, but two coats will give you a deeper, more protective finish. The oil will darken the wood slightly and make the grain pop, which is exactly what makes this project feel high-end. Let the shelf dry overnight in a well-ventilated room so the oil cures fully before you hang it.
How to Install a Floating Shelf Without Stress
Now for the part that kept me up at night, the actual hanging. For a beginner, I strongly suggest using a metal shelf bracket that you screw into a wall stud, rather than trying to build an internal French cleat. Studs are usually spaced 16 inches apart, so a 24-inch shelf will easily catch at least one stud. Use your stud finder to locate it and mark the center.
Hold your bracket up to the wall, use your spirit level to check it is straight, and mark the screw holes. Drill pilot holes into the stud to prevent the wood from splitting, and then drive the screws in with your drill. Slip the hollow shelf over the bracket, and you are done. The key is to take your time with the level; a crooked shelf is the only thing that will ruin the look.
Styling Tips for Your New Scrap Wood Shelf
With the shelf installed, it is time to style it so it enhances your cozy corner. Do not overcrowd the space; a floating shelf looks best with a few curated items that vary in height and texture. I placed a small potted plant, a stack of my favorite novels, and a tiny ceramic dish for my watch and keys.
Because the wood has that warm, natural glow, it pairs beautifully with soft textiles like a chunky knit blanket or a linen cushion nearby. The shelf works as a mini-display area that draws the eye to the corner. This DIY does not just add storage, it actually makes the whole room feel more intentional and curated.
Final Thoughts on Your First Woodworking DIY
Building this floating shelf took me about an hour, but the satisfaction has lasted much longer. It proved to me that a cozy home is not about having the perfect store-bought decor; it is about making functional pieces with your own hands. The natural oil finish and the warm wood grain make it look like a high-end piece, but the story behind it is the real value.
If you have a scrap board lying around and a weekend afternoon to spare, I hope you give this a try. Save this project for your next cozy DIY day, and let me know in the comments how your shelf turns out, especially if it is your very first woodworking project. You might just surprise yourself with what you can build.
Leave a Comment