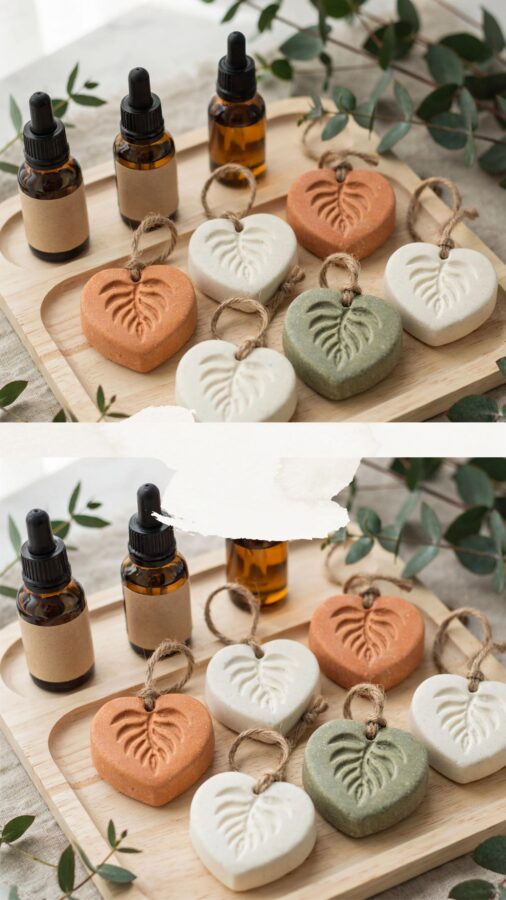
If you have ever pinned a gorgeous photo of DIY Clay Diffuser Stones and then ended up with a crumbly, oil-stained mess, you are not alone. This beginner aromatherapy craft looks deceptively simple, but small details can make the difference between a beautiful, long-lasting stone and a disappointing lump of dried clay. I have made almost every mistake in the book, so I want to share the most common pitfalls and exactly how to dodge them. Once you know these tricks, you will be making perfect diffuser stones every time.
Choosing the Wrong Type of Clay for Your Diffuser Stones
Not all clays are created equal for this project. Air-dry clay is the standard choice, but there are several varieties. White air-dry clay (like DAS or Creative Paperclay) works well because it is porous enough to hold oils. Terracotta air-dry clay is even more absorbent and gives a natural, earthy look.
Avoid polymer clay that needs baking in the oven. It does not absorb oil well, and the heat can alter the scent of your oils. Also skip clays that contain a lot of glues or additives, they often seal the surface and prevent diffusion. Stick with a simple, porous air-dry clay and test a tiny sample before making a full batch.
Skipping the Scent Test
I learned this one the hard way. Some essential oils, especially citrus oils like lemon or bergamot, can stain lighter clays yellow or leave a sticky residue. Others, like patchouli, are so thick that they barely absorb. Before you commit to a full batch, dab a single drop of your chosen oil on a spare test stone.
Let it sit for 10 minutes, then check for discoloration or a greasy film. If the oil pools on top instead of sinking in, that oil is not a good match for that clay. Stick with oils that absorb quickly, such as lavender, peppermint, or eucalyptus, and save the thick resins for a different project.
Using Too Much Essential Oil
More oil does not mean more scent. In fact, overloading your diffuser stones causes the oil to pool on the surface and evaporate rapidly, leaving barely any lasting fragrance. The clay needs time to absorb the oil and release it slowly throughout the day. I aim for 5 to 8 drops per standard-sized stone (about the size of a silver dollar).
If you want a stronger scent, let the stone dry fully after the first application, then add a second round of 3 to 4 drops. This layered approach gives a longer, steadier release. Overloading also makes the stone sticky and attracts dust, so less truly is more.
- Start with 5 drops for a small stone, 8 for a larger one.
- Wait until the stone feels dry to the touch before adding more oil.
- If you see a puddle, blot it with a paper towel and use fewer drops next time.
Not Letting Your Stones Cure Properly Before Use
Patience is the hardest part of this craft. Freshly shaped clay stones feel dry on the surface after a few hours, but they are still damp inside. If you add oil too early, the moisture trapped inside can prevent proper absorption and even cause mold to grow weeks later. I always let my stones cure for at least 48 hours in a warm, dry place.
Flip them every 12 hours so both sides dry evenly. If you live in a humid climate, extend the cure time to 72 hours. A fully cured stone should feel lightweight and sound slightly hollow when tapped. Rushing this step is the number one reason diffuser stones crack or smell musty down the road.
Forgetting to Seal Your Clay Diffuser Stones
Sealing is optional, but it can extend the life of your stones significantly, especially if you plan to use them in a car or near a window. Unsealed clay absorbs moisture from the air over time, which can cause the stone to soften or develop mold in humid conditions. A single coat of clear matte acrylic sealer (non-toxic and water-based) protects the surface without blocking oil absorption.
Seal only the bottom half of the stone if you want the top to remain porous for quick oil changes. Test the sealer on a scrap stone first to make sure it does not yellow. I personally only seal stones that will be gifts
#DIYClayDiffuserStones #AromatherapyCraft #BeginnerDIY #NaturalHomeScent #ClayCrafts
Leave a Comment