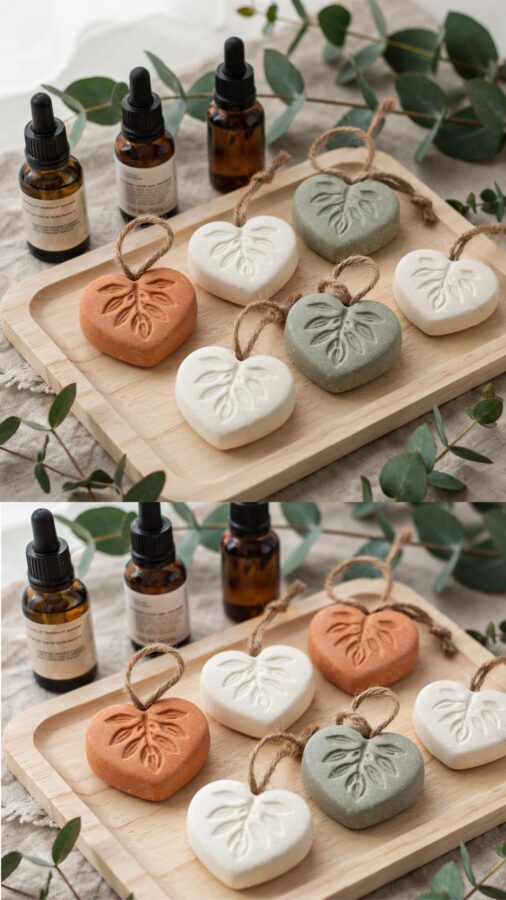
I remember the first time I tried making clay diffuser stones. I had a cheap electric diffuser that kept breaking, and I wanted something that wouldn’t plug in or need water. After a few messy attempts, I discovered that simple air-dry clay and a few drops of essential oil could create clay diffuser stones that actually worked. They absorbed the oil slowly and released a gentle scent all day long. No more burnt-out motors or forgotten water changes. Just a quiet, natural aromatherapy that sat on my desk and looked pretty too.
Why I Started Making My Own Clay Diffuser Stones
My kitchen counter was cluttered with half-empty bottles of essential oils and a diffuser that hissed and clicked. I wanted something quieter, cheaper, and more personal. I had seen ceramic diffuser pendants in shops, but they cost twenty dollars each. So I grabbed a block of white air-dry clay from the craft store, rolled it into small shapes, and dripped lavender oil onto them. The scent lasted for about two days. That was enough to convince me. You don’t need any special tools or experience to make these. Just clay, oil, and a few minutes of your hands.
Making your own also means you control the shape, the size, and the scent blend. You can make a dozen stones for the price of one store-bought pendant. And because the clay is porous, the oil absorbs deep into the material instead of evaporating in a few hours.
The Best Clay to Use for Absorbing Essential Oils
Not all clays work the same way. I tried polymer clay first (the kind you bake) but the oil just sat on the surface and never soaked in. Polymer clay is too dense. For diffusion, you want something porous. I found that natural air-dry clay works best. Look for a brand labeled as low-fire or terra cotta style, but any plain, unglazed air-dry clay will do. The grey or white clay tends to hold scent slightly longer than the colored varieties. I use DAS air-dry clay, but you can use any brand as long as it is not sealed or pre-glazed.
You can also use cold porcelain clay (homemade from cornstarch and glue), but it takes longer to dry. If you want a pure natural material, choose a clay that lists only clay minerals and water. Avoid clays with added polymers or plasticizers because they reduce absorbency.
Step by Step: Mixing, Shaping and Drying Your Stones
Start with a clean surface. I use a silicone mat, but parchment paper works too. Break off a piece of clay about the size of a walnut and knead it in your hands for twenty seconds to soften it. Roll it into a ball, then flatten it slightly into a disc, a star, a leaf, or whatever shape you like. You can press a small stamp or a piece of lace into the surface for texture. I like making small discs about the size of a quarter and half a centimeter thick.
- Shape the stone however you want, but keep it under one centimeter thick so it dries evenly.
- Use a toothpick to poke a hole if you plan to string them onto a cord later.
- Let the stones dry on a plate or a rack for 24 to 48 hours. Flip them once after the first day.
- Do not put them in the oven or microwave unless the clay package specifically says it is safe.
- Once fully dry, the stones should feel hard, light, and slightly rough to the touch.
The drying time depends on humidity. In my dry apartment, small stones are ready in about 30 hours. If they feel cool or bend at all, give them another day.
How to Customize with Scents and Colors for an Easy Craft
After the stones are dry, you can add color. I mix a few drops of food coloring into water and paint the stones with a soft brush before adding oil. The color lightens as the stone dries, so aim for a bit darker than you want. You can also leave them natural and let the clay color show. For scent, use pure essential oils, not fragrance oils that contain synthetic solvents. The synthetic ones can leave a sticky residue and do not last as long.
Start with three to five drops per stone. Rub the oil onto the surface with your fingers. The clay will darken where the oil lands, then dry back to a lighter shade. Let the oil absorb for ten minutes before using. You can layer oils: drop lavender first, then a dot of peppermint. The combination blends as the stone breathes. I have a stone near my desk with a mix of eucalyptus and cedarwood that lasts nearly a week before needing a refresh.
Using the Stones for Natural Aromatherapy That Lasts
Place your dry, oiled stones on a small dish near your workspace, in a closet, or inside a drawer. The scent is gentle, not overpowering like a plug-in diffuser. I keep one on my nightstand with chamomile oil for evening reading, and another in my car cup holder with
#ClayDiffuserStones #DIYHomeScent #NaturalAromatherapy #HandmadeGifts #EasyCraft
Leave a Comment