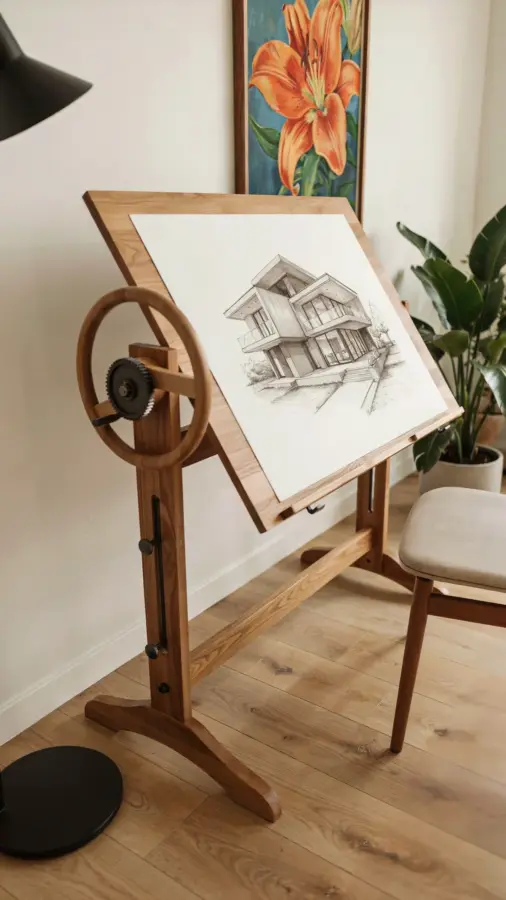
If you have been hunting for a solid drafting table plan that actually works for a modern creative space, this one is worth your time. I designed this adjustable drawing desk for my own home workshop back in early spring, right when everyone started rearranging their home offices for the fifth time. The result is a sturdy, practical worktable that folds flat for storage and tilts to any angle an artist or architect could need. Whether you are a weekend woodworker or a seasoned builder, this project delivers a custom piece without the custom price tag.
Why Build Your Own Adjustable Drawing Desk Instead of Buying
Store-bought drafting tables often feel flimsy or cost a small fortune, especially the ones with smooth angle adjustment and a decent surface. I priced a few last winter and walked away shaking my head. A basic model with particle board and plastic hardware ran over $200. For a few more dollars in lumber and an afternoon of cutting, you can build a heirloom-worthy desk from solid wood. Plus, you get to tweak the dimensions to fit your exact studio space or alcove. The built-in tray alone makes this design worth the effort, it keeps pencils, rulers, and erasers from rolling off onto the floor.
Choosing the Right Wood for Your Drafting Table Plan
For this project, I recommend Baltic birch plywood for the main desktop and tray. It is stable, sands smooth, and holds screws well without splitting. Pine or poplar work fine for the legs and support arms if you want to save money, just make sure the pieces are straight and dry. If your workspace is in a damp basement or garage, consider sealing the wood with a polyurethane finish before assembly. That extra ten minutes prevents warping later. My build used 3/4-inch birch for the top and 1×4 poplar for the frame, and the table has stayed square through three humid summer months.
Adjustable Angle Mechanism Explained Simply
The key to a good drafting table is a reliable hinge system that locks at multiple angles. I used a pair of heavy-duty steel drawer slides repurposed as pivots, combined with wooden brace arms that slot into notches cut into the side rails. It sounds more complicated than it is. You cut a series of angled slots into two pieces of hardwood, then attach them to the legs with a bolt and wing nut. Tighten the wing nut and the tabletop stays put at any angle from flat to almost vertical. No expensive gas struts or metal brackets required. Test the slots with scrap wood first to get the spacing right, then cut the final pieces.
Cut List and Materials You Need
Here is a basic list to get you started. Adjustments may vary depending on your desired table height and width. I built a 30-inch tall table with a 48-inch by 30-inch top, which works for both seated and standing work.
- Desktop panel: 1 piece of 3/4-inch plywood, 48 inches by 30 inches
- Legs: 4 pieces of 1×3 poplar, each 30 inches long
- Side support rails: 2 pieces of 1×4 poplar, each 30 inches
- Angle brace arms: 2 pieces of 1×3 hardwood, each 24 inches (cut notches later)
- Supply tray: 1 piece of 1/4-inch plywood, 48 inches by 4 inches, plus two small side pieces
- Hardware: 4 wing nuts, 4 bolts (1/4-inch diameter, 2 inches long), wood screws, wood glue
You also need a circular saw or jigsaw, a drill, a square, sandpaper, and your finish of choice. That is really it. The whole project can be done in a single weekend including drying time for the finish.
Step-by-Step Assembly for Your DIY Drawing Desk
Start by cutting all your wood pieces to size based on your own draft. Sand everything smooth, especially the edges of the desktop where you will rest your arms. Assemble the leg frame first: attach two legs to each side support rail using screws and glue. Make sure the legs are square to the rail, or the whole table will wobble. Then drill pivot holes near the top of each side rail for the bolts that will hold the desktop.
Now cut the angle notches into the brace arms. Mark lines every 15 degrees from the top edge, then use a jigsaw to cut a slot about 1/2-inch wide and 1 inch deep. Test the desktop tilt by fitting a bolt through the brace arm and into the side rail. Once the angles feel smooth, attach the desktop to the side rails with two hinges at the back edge. Attach the supply tray to the front edge of the desktop with small screws and glue, leaving an inch overhang on each side for pencils to stay put. Final step: mount the brace arms to the desktop with another set of screws and bolts, then add the wing nuts.
Finishing Touches and Customization Ideas
I painted my drafting table a muted sage green because it helps me focus, but a clear matte polyurethane shows off the birch grain beautifully. If you plan to use markers or wet media, seal the desktop with three coats of water-based poly to prevent stains. You can also
#draftingtable #woodworkingplan #drawingdesk #diydesk #furniturebuilding
Leave a Comment