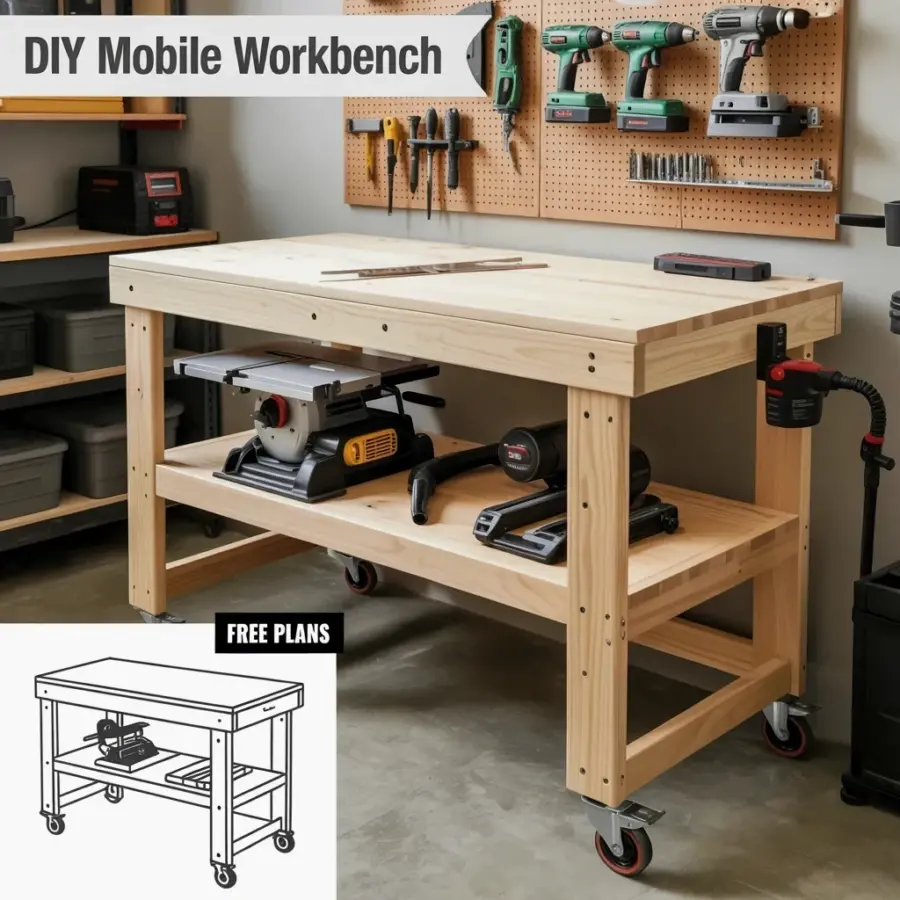
Look, I finally built a mobile workbench for my table saw. And I did it without spending a ton of cash. I used the plans from Bitterroot DIY, grabbed a bunch of scrap wood from the pile behind my garage, and honestly, it came together better than I expected. This cart rolls smooth and holds my saw securely. Perfect timing too, because my old setup was driving me crazy. If you are looking for a budget-friendly workshop project for this season, you gotta check this out.
Why I chose the Bitterroot DIY table saw cart plans
Ok so, I looked at a lot of affordable woodworking plans for beginners before settling on this one. Some were way too complicated. Some looked like they would fall apart after a month. The Bitterroot plans felt different. They were clear, specific, and used a simple box frame construction that I could actually follow without scratching my head for hours. Not gonna lie, the measurements were spot on. That saved me a ton of headache. Plus, the design lets you adjust the height a bit, which is nice if you are tall like me or if you are shorter. My back hurts enough already, I didn’t want to hunch over a low cart every time I need to rip a 2×4.
Sourcing materials without breaking the bank
Here is the thing about a budget friendly workshop project idea: you have to be smart about where you get your stuff. I did not run to the big box store for everything. I hit up Facebook Marketplace for the plywood. Found a half sheet of 3/4 inch for ten bucks. Ten bucks! The rest was literally scrap from an old shed I tore down last summer. I did buy new screws though. Don’t cheap out on screws. Nothing worse than a stripped screw head when you are almost done with a joint. Oh, and I used a little wood glue too. Because why not. It makes everything feel more solid.
- Plywood from Facebook Marketplace: $10
- Screws and glue from the hardware store: $15
- Locking casters (Harbor Freight): $48 for a set of four
- Scrap wood from my pile: free (the best price)
See what I mean? You don’t need a huge budget. You just need a little patience and a willingness to dig through someone else’s trash pile. It is kind of fun actually. Like a treasure hunt.
Building the frame for the mobile workbench
The build itself took me a weekend. Saturday morning I cut all the pieces. Saturday afternoon I started assembling. The design uses a lot of pocket holes, which I am honestly a fan of. It makes the whole thing square. Square is good. A crooked cart is a nightmare. One tip: dry fit everything first. I almost glued my pieces together wrong and would have had to start over. That would have sucked. So yeah, dry fit, check it, then send it. The plans walk you through the diy table saw cart assembly tips really well, so I wasn’t left guessing. The most complicated part was making sure the base was perfectly level before I attached the top. I used a cheap bubble level I found in a drawer. It worked fine. Don’t overthink the tools. You probably already own everything you need.
Getting the wheels right for smooth rolling
Let me talk about casters for a second. The plans called for heavy duty casters for a shop cart, and I listened. I got a set of locking swivel casters from Harbor Freight. They were like 12 bucks each. Worth every penny. Because nothing is more annoying than a cart that wobbles when you try to push it or slides around when you are cutting. I mounted them with bolts and lock washers. I do not want a wheel falling off in the middle of a cut, that is a safety hazard for sure. The cart rolls over the extension cord on the floor like it is nothing. Smooth. That is the word. Smooth. Also, make sure two of the casters lock. You need that stability when you are ripping long boards. Trust me on this one.
Customizing the cart for storage
Now, the plans give you a basic cart. But I am a hoarder of scrap wood. So I added a lower shelf. I just cut a piece of thin plywood and screwed it into the bottom stretchers. Boom. Instant storage. I threw my miter gauge, some push sticks, and a random collection of clamp parts down there. It is not pretty but it works. I also thought about adding a drawer, but honestly, I ran out of steam. Maybe next time. Actually, probably not. I will just use a coffee can for screws. Classic. The real win here was using scrap wood storage solutions within the cart itself. It keeps the top clear for cutting. And it keeps the garage floor clear. No more tripping over loose boards.
How much did this budget diy actually cost?
Alright, the moment of truth. The cost breakdown for my diy workshop furniture experiment was simpler than I expected. Plywood (Facebook Marketplace): $10. Screws and glue: $15. I already had the pocket hole jig. The wheels: $48 for four. That is it. Under 75 bucks total. For a solid, rolling, heavy duty mobile workbench. You cannot buy that at the store. You just cannot. The cheapest
#mobileworkbench #diyworkbench #tablesawcart #budgetdiy #woodworkingplans
Leave a Comment