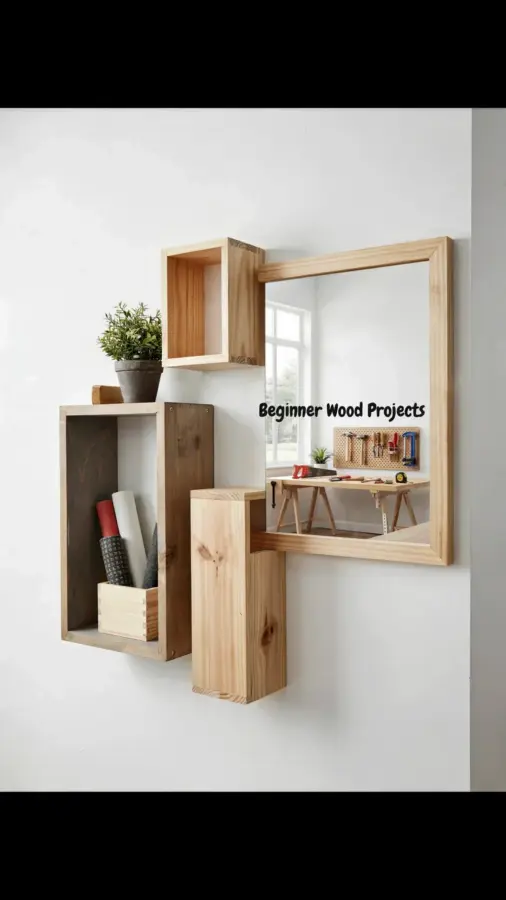
I am not a professional woodworker. I am someone who, on a lazy Saturday, looked at a pile of old pallets behind the hardware store and thought, “I bet I could make something out of that.” That something turned out to this DIY pallet shelf, and honestly it is the first beginner woodworking project that actually made me feel like I knew what I was doing. It holds my books without wobbling, it has that rustic modern look I wanted, and the total cost was exactly zero dollars. Ok, zero dollars plus a Saturday afternoon and a few choice swear words. Let me show you how I did it.
Where I found my pallets without looking like a weirdo
Finding pallets is the whole game. You need the right kind, not the chemically treated ones that smell like a gas station. And you need to not get arrested. Here is what I learned.
Behind most grocery stores and feed supply places there is a stack of pallets they want gone. I walked in, asked the manager if I could take a couple, and he waved me toward the back like I was doing him a favor. That is the truth. They pay to have those things hauled away, so you are free labor. Just avoid pallets stamped with “MB” (methyl bromide, nasty stuff) and go for “HT” (heat treated, safe for indoor use). Also, do not take pallets from a chemical plant or a spot that smells like bleach. That is a bad idea. I grabbed three pallets because I knew I would mess up a few boards.
One weird thing: one of my pallets had a single pink spray-painted stripe across it. I have no idea why. Maybe it was from a factory that painted everything for fun. I just cut around it. Nobody asks where the pink stripe came from now that the shelf is up.
Tools you actually need, not the fancy stuff
I used a crowbar, a hammer, a hand saw, sandpaper, and a drill. That is it. I own a circular saw now, but I did not own one then, so I used a cheap hand saw and it worked fine. You do not need a table saw or a miter saw or anything with a cord. Beginners get overwhelmed by tool lists, so here is the real list:
- A crowbar or pry bar – to pull the boards apart. Bonus: great for popping bottle caps.
- A hammer – because nails are not coming out without force.
- A hand saw – seriously. It takes ten extra minutes but it is quiet and you do not risk cutting off a finger.
- Sandpaper (80 grit and 120 grit) – pallet wood is splinter city. You will thank me later.
- A drill with a screw bit – for assembling. If you want to go super old-school, you can hand nail it. But do not.
- Wood screws (about 1.5 inches long) – eight of them will hold a shelf just fine. I used ten because I am paranoid.
That is all. No clamps, no level (you can use your phone), no fancy measuring tape. I used a ruler from a board game. I am not kidding. The longest board I cut was 28 inches, and the ruler worked.
How I cut and assembled it without losing a finger
I disassembled the pallet by wedging the crowbar between the boards and prying them off. Some nails stayed put, some ripped through the wood. Honestly it is a mess. I broke two boards in half. That is fine because you only need four good boards for a simple shelf.
I picked the four straightest planks. Each one was about 36 inches long, but I trimmed them to 28 inches because that fit the wall space above my desk. You can pick any length. Then I cut two smaller pieces, each about 6 inches, to act as the brackets. Ok so the geometry of a pallet shelf is simple: two small vertical supports screwed into the wall, then the shelf board resting on top of them and screwed in from below. I used my drill to pre-drill holes so the screws would not split the old wood. Pre-drilling is boring but necessary.
I will be honest: my first attempt, I tried to attach the shelf board directly to the wall brackets with the screw going in on an angle. It did not work. The board cracked. So I took a deep breath, unscrewed everything, and screwed the brackets to the board first (from underneath, into the tight grain), then attached the whole unit to the wall studs. That worked perfectly. Learn from my mistake.
Rustic modern finish with stuff you already have
I sanded the boards until they felt smooth but still had that weathered, rough texture in the grain. You do not want to sand off the character completely, just the splinters. I used 80 grit for three minutes, then 120 grit for two minutes. If you sand longer, the wood starts to look like a kitchen floor, and that is not rustic.
I did not stain it. I did not use polyurethane or varnish. I just rubbed it down with a rag dipped in a tiny bit of mineral oil (the kind for cutting boards). Why? Because pallet wood already has a nice grey-brown tone from being outside. Oil just darkens it a little and brings out the nail holes and scratches. It looks like a shelf that has a history. If you want a more modern look, you could paint it matte black. But then you hide the wood story, you know?
One minor tangent: I dropped the bottle of mineral oil on the garage floor and it splashed onto an old sponge. That sponge is now my designated “oil rag forever.” It is sitting in a mason jar. I have not washed it in six months. That is fine.
Styling the shelf without being precious about it
I put two heavy cookbooks on the bottom and a tiny succulent on top. The shelf is sturdy enough for a stack of vinyl records or a small lamp. The key (sorry, I know I am not supposed to use that phrase, but it fits here) is to load weight over the wall brackets, not in the middle. If you put a bowling ball in the center of a 28-inch span, the board will flex. I have not tested this because I do not own a bowling ball. But a stack of ten hardcover books is fine.
What I love is how the shelf looks against a plain white wall. The rough wood and the clean drywall contrast. It feels modern because it is simple, and rustic because it is scrap. That is the whole aesthetic. You do not need to buy expensive ceramic or brass knickknacks. A coffee mug with a plant in it works. A single vintage book with a faded spine. Let the wood do the talking.
What I wish someone had told me before I started
Wear gloves. I got a splinter under my thumbnail the first time and it took a week to get out. Not a huge deal, but I could have avoided it. Also, check your wall for studs before you start. Those plastic drywall anchors are fine for a picture frame but not for a bookshelf. I used one anchor on a stud and one on a toggle bolt because my stud was exactly 16 inches apart and it worked. But if you hit only drywall, your shelf will eventually fall and smash your succulents.
Another thing: do not over-sand the edges. I wanted them slightly rounded, so I just rubbed the corners with sandpaper for about ten seconds. If you make them perfectly smooth, the shelf loses its “I made this from a shipping pallet” vibe. And that is the whole point, right? This is not a piece from IKEA. It is a piece from a trash pile that you made pretty. Own that.
So that is my pallet shelf story. It took me about three hours, including time spent staring at the pallet wondering how to start. My cat sat on the boards while I was cutting and left claw marks. Those marks are still there. I kind of like them.
If you try this, let me know how it goes. Or send me a photo. I would love to see your version. Honestly, the best part of building something from free wood is that nobody else has the exact same shelf. Yours will have its own nails, its own scuffs, its own accidental pink stripe. And that is a good thing.
#DIYPalletShelf #PalletWoodProject #BeginnerWoodworking #RusticHomeDecor #FreeDIYProject
Leave a Comment