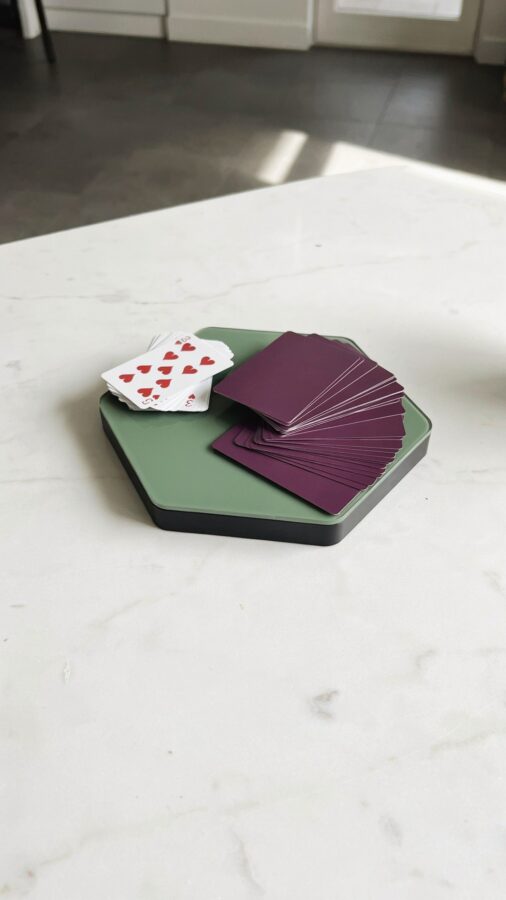
When I first built a DIY wooden card organizer, I had no idea how much smoother game nights would become. The key was adding vibrant color rails that let cards glide instead of stick. If you love games like 5 Crowns or Sky-Jo, this project gives you a custom holder that looks great under any light. And the best part? You can build it this weekend with simple tools and free plans.
Why Colorful Rails Make a Difference for Smooth Game Play
Standard card holders often have plain slots that grab at the cards. The color rails I use are thin strips of painted wood that create a low-friction track. Each rail lifts the card slightly so it slides with a light push. That buttery movement is what I call smooth game play. It turns a frustrating shuffle into a quick, satisfying action.
I painted my first set of rails in three different hues. That helped me see which ones worked best. The result was a holder that looks playful and performs like a pro model. If you want consistent movement, the rails must be sanded smooth and sealed with a hard finish. A bit of wax on the surface also helps cards scoot without snagging.
Choosing the Right Wood for Your Card Holder DIY
For a sturdy foundation, I recommend plywood or hardwood like poplar. Plywood stays flat and won’t warp easily. Hardwood gives a more premium feel, especially if you add a clear coat. Since this is a woodworking DIY project, avoid soft woods like pine that dent under pressure. A 1/2 inch thick board is ideal for the base, while the rails can be 1/4 inch strips.
- Baltic birch plywood: Stable, fine grain, takes paint and stain well.
- Poplar: Affordable, easy to shape, good for painted rails.
- Maple: Hard and smooth, great for a natural finish.
- Red oak: Durable with an open grain that needs filling for rails.
I prefer Baltic birch for the base because it resists splitting when you cut the slots. Then I use poplar strips for the color rails because poplar holds acrylic paint evenly. You can mix and match based on what’s available at your local lumber yard.
Three Rail Color Schemes That Pop Under Light
The color rails are the star of this project. They aren’t just functional. They add personality to your card holder DIY. Here are three schemes I have tested and loved.
Scheme 1: Neon Trio – use bright pink, electric yellow, and lime green. Under a lamp or overhead light, these colors reflect and make the card edges visible. Perfect for low-light game rooms. I used Rust-Oleum spray paint in neon tones, applied two thin coats.
Scheme 2: Jewel Tone Gradient – deep teal, amethyst purple, and amber orange. These rich hues look sophisticated while still providing contrast. They work especially well with dark wood bases. I brushed on acrylic craft paints and sealed with polyurethane.
Scheme 3: Pastel Trio – soft mint, baby blue, and lavender. This gives a calm retro vibe. The pastels don’t scream for attention, but they still catch light nicely. For best results, use a matte finish to keep the colors subdued.
No matter which scheme you choose, make sure the paint or stain is fully cured before inserting cards. Otherwise the color can transfer to the card edges over time.
Adding Personal Touches for a Custom Card Holder
Once the basic organizer is assembled, you can make it truly yours. I like to engrave a small initial or a game symbol on the front edge. A pyrography pen gives a handcrafted look. You could also route a shallow groove and fill it with colored epoxy for a decorative stripe.
Another simple upgrade is adding felt pads on the bottom. They keep the holder from sliding on a tabletop during intense rounds of Sky-Jo. For a more refined finish, apply a coat of Danish oil to the wood before adding the rails. That highlights the grain and protects against spills. Little details like these turn a functional piece into a thoughtful DIY gift for a fellow game lover.
How to Finish Your Organizer for Long Lasting Fun
Finishing matters more than you might think. If the base is unfinished, cards can pick up tiny splinters. I sand everything to 220 grit, then wipe off dust with a tack cloth. For the base, a wipe-on polyurethane gives a smooth, durable surface without brush marks. Apply three thin coats, sanding lightly between each coat with 320 grit.
#WoodworkingDIY #CardHolderDIY #ColorfulRails #SmoothGamePlay #DIYGifts
Leave a Comment