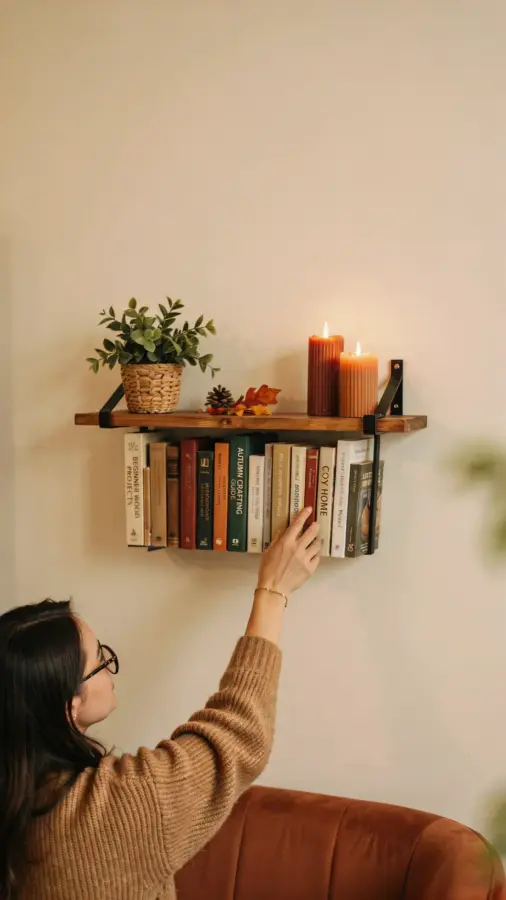
You’ve got a stack of books that doesn’t fit anywhere, and a blank wall that’s just collecting dust. I made this hanging bookshelf last month because I refused to pay forty bucks for a fabric shelf that was basically a board and some straps. Honestly, the whole project took me one afternoon, a single saw cut (or none, if you ask the hardware store to do it), and a roll of elastic that cost less than my morning coffee.
The exact material list for a hanging bookshelf on a budget
Here’s the thing: you don’t need a workshop, a table saw, or any of that intimidating stuff. My total came to just under $22, and that includes a little leftover elastic I’ll use for something else someday. I’m giving you the exact sizes I used, plus the cheaper alternatives that work just as well.
- One pine board, 1 inch by 10 inches by 4 feet (about $12 at the hardware store)
- 2 yards of 2-inch wide elastic fabric, black or any color you like (around $6)
- A power drill with a 3/8 inch drill bit (or a hammer and a nail, if you’re brave)
- A saw, or just ask the nice person at the lumber desk to cut the board for free
- Sandpaper, medium grit, because pine splinters are no joke
That’s it. No brackets, no glue, no complicated joinery. Just wood, elastic, and a wall to attach it to.
How to pick the right wood board without overthinking it
Walk into any hardware store and you’ll see a mountain of lumber options. Ignore most of it. For this DIY bookshelf, a regular pine board is perfect because it’s light, cheap, and easy to drill through. You don’t need premium hardwood or plywood.
Look for a board that’s straight and doesn’t have huge knots. A little warping is fine, but a twist will make your shelf tilt forward like it’s leaning out of a window. Also, ask them to cut the board into two 24-inch pieces while you’re at the store. That saves you from having to buy a saw or borrowing one from your neighbor.
One thing I didn’t think about the first time: sand the edges before you do anything. Pine splinters are aggressive, and I got one stuck under my thumbnail for three days. Use 120-grit sandpaper and round over every sharp corner.
Elastic fabric is the secret, not the hardware
Most hanging bookshelves use rope or chains, but elastic changes everything. Because it stretches, you can slide books in and out without scraping the wood or fighting a stiff strap. It also gives a little under heavy loads, which means your wall anchors aren’t taking all the force.
You want elastic that’s at least 2 inches wide. Narrower bands dig into book spines and look flimsy. I bought mine at a fabric store, but honestly, you can also find it online or even at some dollar stores if you’re lucky.
Here’s a random tip: buy black elastic if you want the straps to disappear against the wood. Or buy a bright color and let it be part of the look. I went with dark gray because it hides dust, which is very practical and not because I forgot to dust.
Step by step: building your hanging bookshelf in under an hour
Ok so, start by drilling four holes in each board. Place them about 2 inches from the ends and 1 inch from the top edge. If you forget the exact measurements, just eyeball it. These shelves don’t need to be precise, they need to be sturdy enough to hold a few paperbacks.
Cut your elastic into four equal strips. Mine were about 18 inches long each. Thread one strip through each hole, then tie a knot on the top side that’s bigger than the hole. You might want to melt the cut ends with a lighter to stop fraying, unless you like loose threads everywhere.
Now hold the board up against the wall at your desired height. Mark where the elastic lands on the ceiling or the top of your bookcase. I attached mine to a wooden shelf above, which was a lot easier than drilling into drywall with anchors. If you’re going into drywall, use a stud finder or at least heavy-duty wall anchors.
Pull the elastic snug, screw each strap into your mounting point, and then adjust the length by re-knotting or just stretching the fabric slightly. The beauty is that even if one side is a little off, the elastic flexes to fix it.
My honest budget breakdown and where to save money
I spent $11.99 on the pine board, $5.50 on elastic, and about $2 on sandpaper I didn’t really need because I already had some. Total: $19.49. That’s less than half of what a prefab hanging bookshelf costs online, and mine is actually nicer because I made it exactly the size I wanted.
But you can go even cheaper. Use a scrap board from a pallet if you’re willing to sand it down. Use elastic from an old pair of pajama pants (don’t do this, it’s too narrow, but I considered it). Check the clearance bin at the hardware store for damaged boards. They’re usually 50 percent off and just have a small gouge.
The only thing you shouldn’t skimp on is the wall anchors. If you’re mounting into drywall, buy the good rated ones. A falling shelf full of books will destroy your floor and your mood in one loud crash.
Ways to style your DIY bookshelf and what to put on it
This isn’t a heavy-duty shelf for encyclopedias, so treat it like a display spot. I put my three favorite dog-eared paperbacks on the bottom shelf, a little potted succulent on the top, and a framed photo propped against the elastic strap. It looks like something from a design magazine, but it cost me twenty bucks and a hour of my life.
Try hanging two boards vertically with one long strap, or stagger them at different heights for a weird, artsy wall arrangement. The elastic lets you adjust the angle slightly, so you can lean the whole thing to match your room’s vibe. I added a small hook on the side of mine and hung my headphones there, which is probably not its intended purpose but it works.
You could also paint the board before adding the elastic. Chalk paint works really well because it sticks to pine without primer, and it gives the wood a matte, soft look. Or leave it natural, pine has a nice warm color that fits most rooms.
Common mistakes to avoid with fabric shelves
First mistake: making the straps too short. You can’t stretch them enough to get the board level, and then you’re stuck retying knots while holding a board with your chin. Cut them longer than you think, trim the excess after.
Second mistake: not sanding enough. I already mentioned the splinters, but it also makes the shelf look unfinished. Smooth edges mean you don’t scratch your favorite book covers every time you slide one out.
Third mistake: overloading the shelf. Two rows of paperbacks is fine. A full set of hardcover history books is not. The elastic will stretch permanently, and the board will warp along with it. Use this shelf for light stuff, and keep the heavy tomes on the floor where they belong.
Last one, and this is the weird part nobody tells you: elastic creaks. When you first load the books, you’ll hear a soft squeaking sound as it stretches. That’s normal. It goes away after a day or two, or you’ll just get used to it, like that furnace noise you stopped hearing six months ago.
So that’s the whole project. Great. You can make a hanging bookshelf this weekend with a board and some elastic, and you won’t need a single fancy tool or a master craftsman’s patience. If you try it, let me know what color you picked, I’m already planning a second one for my kitchen.
Leave a Comment