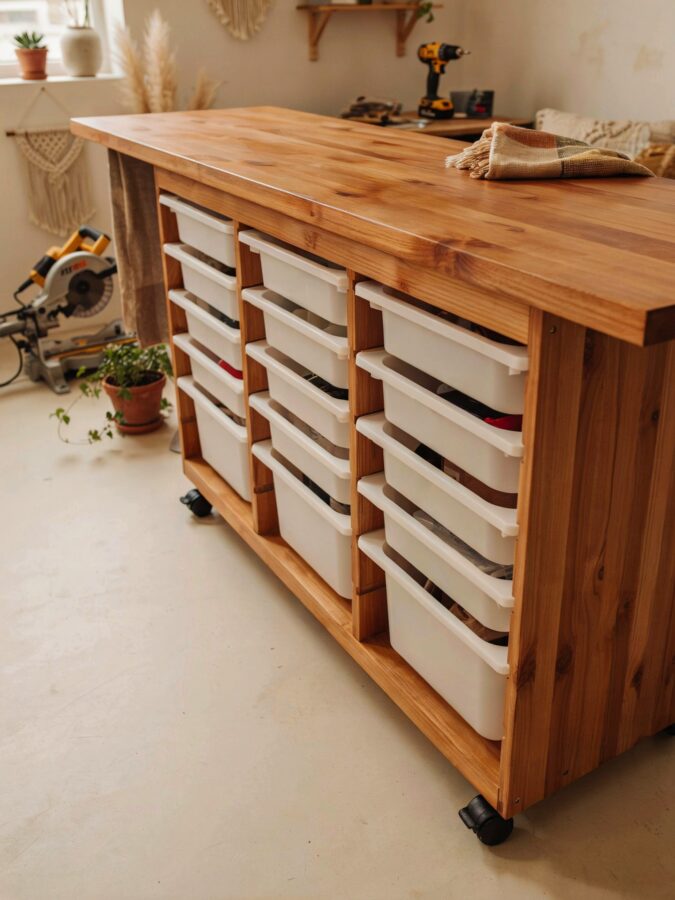
If your workshop or garage has felt like a black hole of tools and supplies, you are not alone. I finally got fed up with the chaos and decided to build my own Ikea rolling storage behemoth this past month. It is not just a cart. It is a heavy-duty, mobile workhorse that can swallow power tools, bins, and hardware without breaking a sweat. And since late summer is the perfect time to tackle garage organization before the colder months close in, I am sharing every step with pictures so you can build one too.
Why Build an IKEA Rolling Storage Behemoth for Your Workshop
I have tried plastic shelving units and flimsy utility carts, and they all sagged or wobbled under the weight of drills and lumber. That is why I turned to some standard IKEA shelving and decided to reinforce it myself. The result is a rolling cart that I can push around my shop floor, even when it is fully loaded with heavy toolboxes. This is not a weekend project for beginners, but if you have basic woodworking skills and a few hours, you can build a storage solution that costs half the price of a professional mobile cabinet.
The seasonal timing works well too. Right now many people are deep-cleaning their garages after summer projects or prepping for fall yard work. This cart lets you store everything in one place and wheel it out when you need it. No more tripping over extension cords.
Materials List for This DIY Furniture Building Project
Before you start, gather your supplies. I used one IKEA IVAR shelf unit because it is solid pine and easy to modify, plus a few basic hardware store items. Here is what you will need:
- One IKEA IVAR shelving unit (choose the 30×74-inch size for a sturdy base)
- Four heavy-duty locking casters (I recommend 4-inch rubber swivel casters rated for 200 pounds each)
- 3/4-inch plywood sheet (cut to 30×24 inches for the bottom platform)
- Wood screws (2-inch and 1.5-inch)
- Wood glue
- Hand saw or circular saw
- Drill with screwdriver bits
- Sandpaper (80 and 120 grit)
- Optional: plywood for side panels if you want enclosed storage
You can also find the casters and plywood at any home center. The total cost ran me about $110, which beats buying a premade rolling cabinet.
Step-by-Step Assembly for the Heavy-Duty Cart
First, assemble the IKEA IVAR shelf per the instructions but do not attach the top shelf yet. You actually want the shelves spaced to fit your specific storage bins, so hold off on the fixed shelves and just put the legs together. I left the bottom shelf at the lowest setting for stability.
Next, cut your plywood platform to match the footprint of the IVAR base. This platform will take the weight off the flimsy particleboard bottom. Screw and glue the plywood into the bottom of the legs. Let it dry for at least an hour.
Now attach the casters. Drill pilot holes through the plywood and into the bottom of the legs, then bolt the casters on. Make sure all four casters lock. I learned the hard way that two locks are not enough for a cart that holds heavy power tools.
Finally, reinstall the remaining shelves at your preferred heights. I kept the top shelf at a comfortable working height (around 36 inches) so it doubles as a portable work surface. The middle shelf holds plastic bins, and the bottom holds my miter saw on a rubber mat.
Customizing Size and Casters for Your Space
Not every garage is the same, so you should tweak the dimensions. The IVAR comes in different widths; I used the 30-inch version because it fits neatly between my workbench and the wall. If you have a tighter space, consider the 20-inch wide cart. You can also cut the legs shorter if you want a lower profile cart that fits under a workbench.
Caster choice is critical. Do not use those little 2-inch casters from the hardware store. They will jam on every pebble and crack. Spend the extra ten dollars on 4-inch rubber casters with locking brakes. If your workshop floor is rough concrete, go with 5-inch pneumatic wheels. They roll over debris without jolting the shelf and breaking things.
One more tip: add a strip of magnetic steel to the side of the cart. Then you can stick screwdrivers and wrenches right onto the cart for quick access. That is not in the original plan, but it is a cheap upgrade that makes the cart feel custom.
Leave a Comment