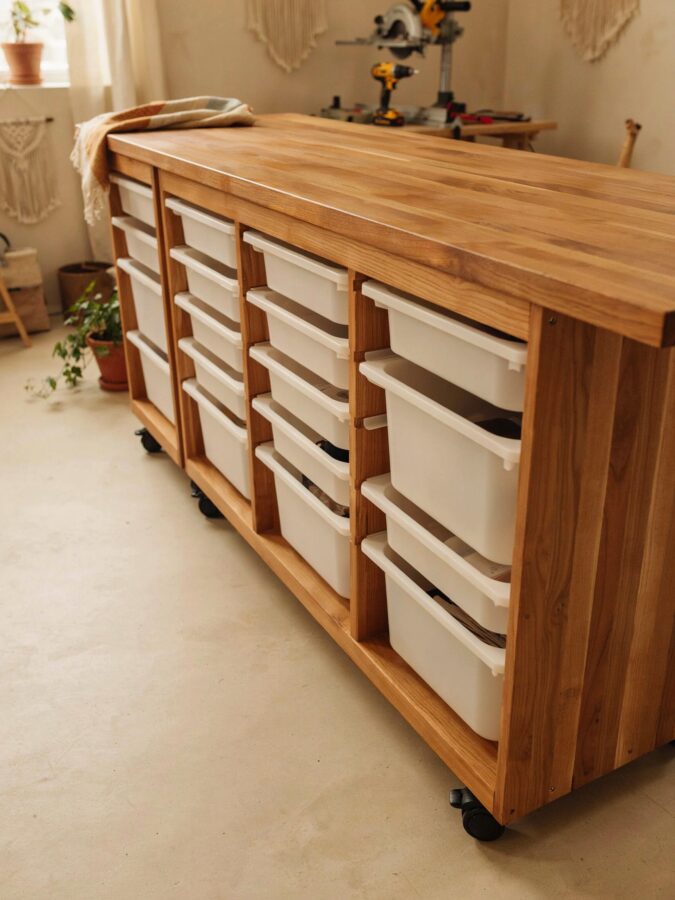
Why You Need an Ikea Rolling Storage Behemoth
If you have ever stepped into a cluttered garage or workshop, you know that floor space disappears fast. Bins stack on bins, tools end up in piles, and finding anything takes twice as long as it should. That is exactly why I built my own Ikea Rolling Storage Behemoth. This project takes the basic idea of IKEA shelving (modular, affordable, clean lines) and turns it into a massive rolling unit on casters. You get sturdy shelves that move wherever you need them, whether it is next to a workbench, against a wall, or rolled outside for a deep clean. Best of all, you do not need a fancy woodshop. A circular saw, a drill, and some plywood are enough to get started. This guide rounds up five distinct themes for building your own rolling behemoth, so you can pick the version that fits your space and your stuff.
The Workshop Workhorse: Building Heavy Duty Rolling Shelves
For a workshop, you need shelves that can handle heavy tools, stacked bins of screws, and maybe even a portable air compressor. Start with 3/4 inch birch plywood. Cut two side panels at 72 inches tall by 24 inches deep. Cut four shelves at 48 inches wide by 24 inches deep. Use dados or simple pocket holes to join the shelves to the sides. Add a 1×6 pine face frame to the front edge for extra rigidity. Mount four locking casters rated for 200 pounds each. The result is a rolling unit that holds over 400 pounds without wobbling. You can add pegboard on one side for hanging tools, or attach a strip of magnetic bar for bits and screwdrivers.
- Long-tail keyword tip: Search for “heavy duty rolling shelving DIY” to find similar projects.
- Material savings: Use two sheets of plywood (one for sides, one for shelves).
- Sturdy casters: Go with plate mount swivel casters, not stem casters.
The Garage Giant: Maximizing Vertical Storage on Casters
Garages often have high ceilings but narrow footprints, so vertical storage is your best friend. Build a tower version of the storage behemoth that is 84 inches tall (seven feet) but only 18 inches deep. That leaves room to walk past even when the unit is fully loaded. Use two side panels, six shallow shelves (48 inches wide by 18 inches deep), and a stiff back panel of thin hardboard. That back panel keeps the unit from racking side to side when you roll it. Add a row of hooks along the top shelf for hoses, extension cords, or folding chairs. The real trick is to space shelves unevenly: one tall shelf for a five gallon bucket, a few medium shelves for paint cans, and small shelves for spray bottles. Label each shelf with painter’s tape so you always know where things live.
The Craft Room Colossus: Adding Drawers and Dividers
Not all storage behemoths need to be open shelves. For a craft room or office, add pull out drawers and adjustable dividers to turn the unit into a mobile organizing station. Build the same frame as the workshop workhorse, but only install three fixed shelves. Then build two or three drawer boxes from 1/2 inch plywood with 1/4 inch plywood bottoms. Mount full extension drawer slides rated for 75 pounds. Use the remaining shelf space for shallow bins and a corkboard back panel for pinning ideas. Paint the whole thing a cheerful color like soft mint or blush. You can even attach a strip of LED lights under the top shelf for better visibility. This theme works great for scrapbookers, quilters, or anyone who hates digging through piles of supplies.
The Kitchen Behemoth: For Bulk Pantry Items
Pantries get chaotic fast. A rolling storage behemoth sized to fit beside a refrigerator or inside a spare closet can hold all your bulk goods. Keep the depth shallow (16 inches) so you can see everything on each shelf. Build the unit at 60 inches tall with five shelves. Use 1×2 pine strips as shelf front lips to keep cans and jars from rolling off when you move the cart. Add a small side rack (attached with screws) for hanging oven
#IkeaRollingStorage #DIYFurniture #WoodworkingProject #StorageBehemoth #FurnitureBuilding
Leave a Comment