Look, I have a confession to make. I used to hate my hot glue gun for anything that required a steady hand. The thick, gloopy blobs it produced were fine for sticking felt together, but utterly useless for the delicate ornaments and wood inlay projects I kept pinning to my crafting board. It wasn’t until I tried a silly hack I saw, modifying my glue gun to handle those tiny details, that everything changed.
I know the idea of modifying your glue gun sounds scary. You’re holding a tool that is literally designed to melt solid plastic into a liquid state, so the thought of poking anything near the nozzle feels slightly wrong, almost dangerous. But trust me, this hack works. It changed my entire holiday crafting setup, and it’s not even hard to do.
If you are tired of thick glue lines ruining your intricate DIY projects, this is for you. We are going to get you that super fine stream of hot glue you’ve been dreaming about, perfect for those delicate wood inlays or sparkly holiday ornaments that break under normal pressure. Let’s just dive in and get our hands dirty, metaphorically speaking, of course.
### What You Need for This Glue Gun Hack
Before we start, let’s talk about the parts. The star of this show isn’t actually a fancy new glue gun, it’s a simple metal tip.
Here is exactly what you need to gather:
– A glue gun with a removable nozzle. This is crucial, check yours before you start.
– A ball pump needle. I use the ones meant for basketballs and volleyballs, they are long and sturdy.
– Pliers, because that nozzle can be really stubborn.
– A heat-safe surface, like a silicone mat or a piece of scrap wood.
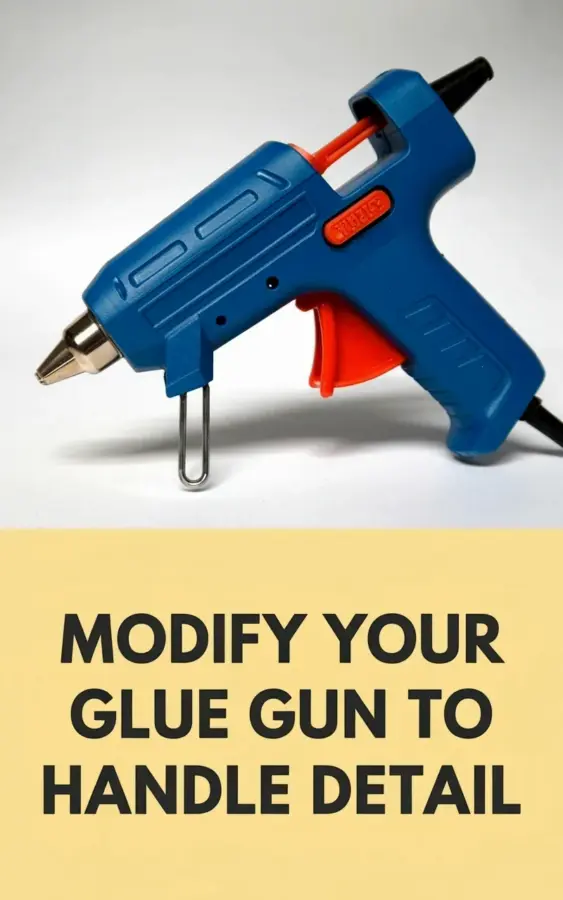
Honestly, the first time I did this, I used a glue gun with a matte blue body and a red trigger. It’s got this ergonomic design that makes it feel a lot easier to grip while you work. I mention it because the photo of this exact hack shows it perfectly. The smooth plastic body is easy to hold even if your hands get a little sweaty from concentrating, and the trigger shape doesn’t dig into your fingers during long sessions. It’s a small detail, but it matters when you are trying to hold your breath and trace a tiny line.
### Step-by-Step: Attaching the Needle to Your Nozzle
This is the part that will get your heart rate up. Don’t worry, it’s simpler than it looks.
First, warm up your glue gun entirely. Let a little glue melt and push through so the adhesive inside is fully liquid. Then, using your pliers, carefully unscrew the factory metal nozzle. The glue will try to dribble out, so have a scrap piece of cardboard ready to catch it. You work fast here, but you don’t need to panic. The glue only cooled slightly as I fumbled with the metal, but it moved fast enough.
Here’s the trick: screw the threaded end of the ball pump needle directly onto the gun where your original nozzle was. The thread sizes are surprisingly compatible with most standard glue guns. When you screw it on, make sure it’s snug, but don’t use all your strength, you need to get it off to clean it later.
Once the needle is attached, you won’t get a giant pool of glue anymore. You will get a very fine, consistent stream. It’s so precise that it feels more like writing with a frosting pen than using a power tool. I did burn my finger that first time. Not gonna lie, it hurt. But seeing the thin line of glue exactly where I wanted it made up for the pain instantly.
### Why This Works for Woodworking Tips and Inlays
I am a sucker for wood inlays. The idea of filling a routed-out channel with color is so satisfying. But my old glue gun would fill the channel in half a second, flooding the entire piece and ruining the clean lines I worked so hard to cut.
With the needle tip, the glue flows differently. It comes out as a thin spaghetti noodle rather than a wide ribbon. This lets you trace the most detailed pattern without the glue spilling over the edges. It’s a massive upgrade for anyone searching for specific woodworking tips regarding adhesive application.
You can even control the speed better. A lighter press on the trigger means a tiny drop. A slower, steady push gives you a continuous line that is barely 1/16th of an inch wide. For intricate holiday crafts where you are adding tiny beads or sequins, this control is a total game changer. You stop fighting the tool and start focusing on the design.
### Mastering the Fine Stream: Techniques and Tricks
Ok so, attaching the needle is only half the battle. You have to learn how to handle the new flow. It’s a different skill set.
Pressure is everything. With a normal nozzle, you pull the trigger and let it rip. With the needle, you need to be more thoughtful. I found that a short, gentle tap creates a perfect dot, ideal for fixing a tiny detail or tacking down a small piece. For longer runs, you need to keep the gun moving at a constant speed.
The angle matters a lot too. Hold the gun more vertically, like you are writing with a pen, rather than at a 45-degree angle like you might normally do. This allows the thin glue stream to lay flat on the surface immediately. One thing I learned the hard way: you have to press firmly but leave the needle slightly off the wood. If the metal touches, it scorches the wood fibers. That smell is awful, seriously, it’s like burnt toast mixed with regret. Just hover it a hair’s breadth above the surface and let the glue pull itself off the needle.
### My Favorite Holiday Crafts and DIY Details Projects
This discovery completely changed how I approach holiday decorating. Honestly, it has saved me so much money because I can now fix things instead of throwing them away.
– **Ornament Repair:** I repaired a vintage Santa ornament that had a tiny crack in his ceramic leg. The fine glue stream filled the hairline fracture seamlessly.
– **Custom Gift Tags:** I use the needle tip to write “Merry Christmas” in glue, then dust it with glitter. The lines are so clean and crisp.
– **Sock Wreaths:** I built a whole sock wreath but used the modified glue gun to attach the final rhinestones. It looked like a professional did it.
– **Wooden Puzzle Tracks:** I made a small marble maze for my nephew, and this hack allowed me to build the walls with precision. He still plays with it daily, which is the highest honor a relative can give you.
Having this control makes the glue dry faster too. Because the stream is thinner, it cools and sets in a matter of seconds rather than minutes. This is perfect if you need to hold a suspiciously slippery ribbon in place while you adjust the bow you are making.
### Cleaning and Maintaining Your Modified Glue Gun
Let’s address the elephant in the room: cleaning up. This is the part that usually makes guys like me procrastinate.
You cannot just throw the needle in a drawer with glue inside. You have to run a clean glue stick through the gun while it’s hot to help flush out the old adhesive residue. After that, you can wipe the needle with a dry rag, but be super fast because it burns. To this day, I have a weird collection of slightly melted rags that serve as a testament to my laziness in this department.
After you let it cool for a few minutes, use your pliers to unscrew the needle. You want to store it in a safe place, these things bend easily. I keep mine in an old pencil case with my other delicate bits. If the needle gets clogged, hold the tip over a candle flame for a second and use a sewing needle to poke out the hardened glue.
Just remember, the needle gets incredibly hot. Do not lay it on a plastic table. Use a metal stand or a thick piece of glass.
### When to Skip This Hack
Look, this hack is brilliant, but it isn’t for every job. It’s a special tool for a specific job. No one wants a super fine stream when they are gluing plywood for a garage shelf.
If you are building large structures, putting together frames, or gluing anything that covers a surface area larger than a coin, just take the needle off. Use the standard nozzle. You will save yourself time and frustration. This DIY detail hack is for the moments where you need perfection, not for structural glue-ups.
Also, bear in mind that some incredibly cheap glue guns have a nozzle that is cast into the plastic body. You cannot remove them. If your nozzle doesn’t have the little metal collar that acts like a bolt, this hack might not work for your specific model. I spent a while trying to find a kit that fit a friend’s cheap budget gun, and honestly, it wasn’t worth the effort. It’s better to just invest in a basic gun with a metal head if you plan to do this.
Adapting your tools for fine details is one of my favorite things about crafting. It feels like a secret. You see the tool in the store, and it has a function, but you know it is capable of so much more. It reminds me of how you can use a specific heat setting to make shrink plastic perfect; it’s all about working smarter.
So, will you try this? Just remember to be careful, keep your fingers away from the needle, and have a fire extinguisher nearby just in case you knock it over. I cannot tell you how many times I’ve almost set my workbench on fire because I got distracted. That’s not a joke, it’s a craft hazard.
Now, go grab that ball pump needle and give your glue gun an upgrade. I promise, once you try it, you won’t want to go back to those messy blobs. Good luck with your projects!
#GlueGunHack #HolidayCrafts #WoodworkingTips #DIYDetails #HotGlueIdeas
Leave a Comment