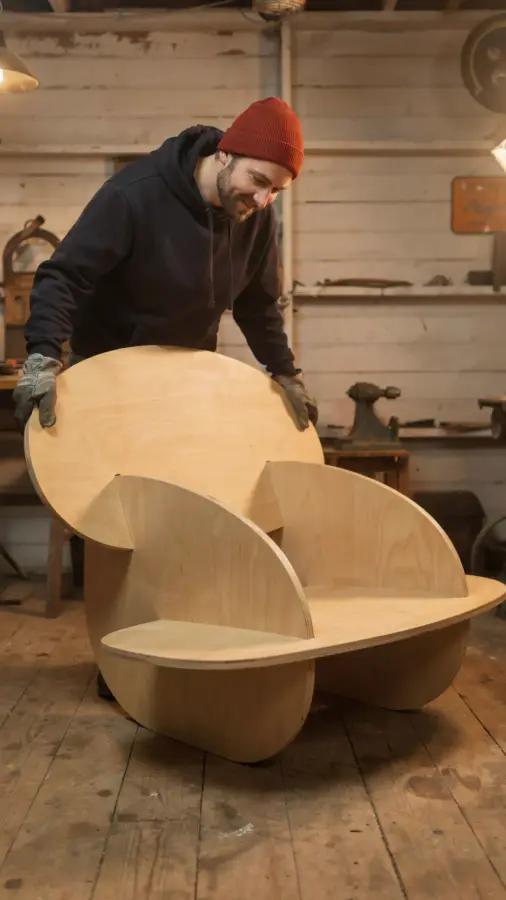
If you have been looking for a weekend project that actually looks good and does not require a workshop full of expensive gear, let me introduce you to the oval rocker plywood chair. This design uses four identically shaped components cut from 1.5 inch thick plywood, and each oval piece has slots that interlock to create a sturdy rocking chair. It is a true beginner woodworking project that delivers real furniture you can use. The best part? You do not need complicated joinery or fancy curves. Just precise cuts and a bit of patience.
Why the Oval Rocker Works for Beginner Woodworkers
Most rocking chair plans involve steam bending, angled mortise and tenon joints, or complex shaping. That is why so many beginners give up. This oval rocker flips the script. Since every piece is identical in shape (just with different slot positions), you only have to dial in one cutting setup. Once you nail that, you repeat it four times. The interlocking slots hold the chair together without glue or screws, though you can add a bit of adhesive if you want extra security. The simplicity is the whole point. It teaches you precision cutting and slot alignment without overwhelming you with joinery techniques.
Choosing the Right Plywood for a Sturdy Rocking Chair
Thickness matters here. The design calls for 1.5 inch plywood. That is not a standard home center thickness, so you might need to laminate two sheets of 3/4 inch plywood together. I have done this with Baltic birch plywood, and it worked beautifully. Baltic birch has many thin plys that resist warping, and the face is smooth enough for a nice finish. Avoid cheap interior plywood with big voids in the core. The rocking chair will see lateral stress as you rock, and voids can cause the interlocking slots to loosen over time.
- Use plywood rated for furniture (at least AC grade or Baltic birch).
- Laminating two sheets? Use a high quality wood glue and clamp evenly overnight.
- Check for flatness before cutting. Slightly warped plywood makes slot alignment tricky.
Understanding the Interlocking Joint System in This Chair Design
The genius of this plywood rocking chair is how the slots work together. Each of the four oval pieces has a slot that starts at a different point along the oval. When you slide them together, the slots create a cross shaped intersection at the center of the chair. The seat and back form naturally as the ovals tilt. You need to get the slot width exactly right. Too tight and you will crack the plywood when you assemble it. Too loose and the chair will wobble. A good rule of thumb is to cut the slots just a hair wider than the plywood thickness, maybe 1/64 inch extra. Test fit on scrap first.
Essential Tools for This DIY Rocking Chair Project
You do not need a CNC machine or a bandsaw. A jigsaw with a fine tooth blade works fine for cutting the ovals, but you need a steady hand and a good guide. A router with a flush trim bit helps clean up the edges after cutting. A drill press or a handheld drill with a guide is useful for the starting holes for the slots. A circular saw with a straightedge works if you are laminating large sheets. Honestly, the most important tool is a sharp pencil and a tape measure. Measure twice, cut once is the motto here. I also recommend a small block plane or sandpaper to fine tune the slot fit.
Cutting and Assembling the Four Oval Pieces
Start by creating a template for the oval shape. You can draw it by hand using a string and two nails for an ellipse, or print a full size pattern from the plans. Transfer the shape onto your plywood stack, making sure the grain direction runs the same for all pieces. Cut each oval slightly oversize with the jigsaw, then route the edges flush to the template. After that, lay out the slot locations using a marking gauge. Cut the slots by drilling a hole at each end of the slot line, then using a jigsaw
#plywood #rockingchair #beginnerwoodworking #woodworkingdiy #chairdesign
Leave a Comment