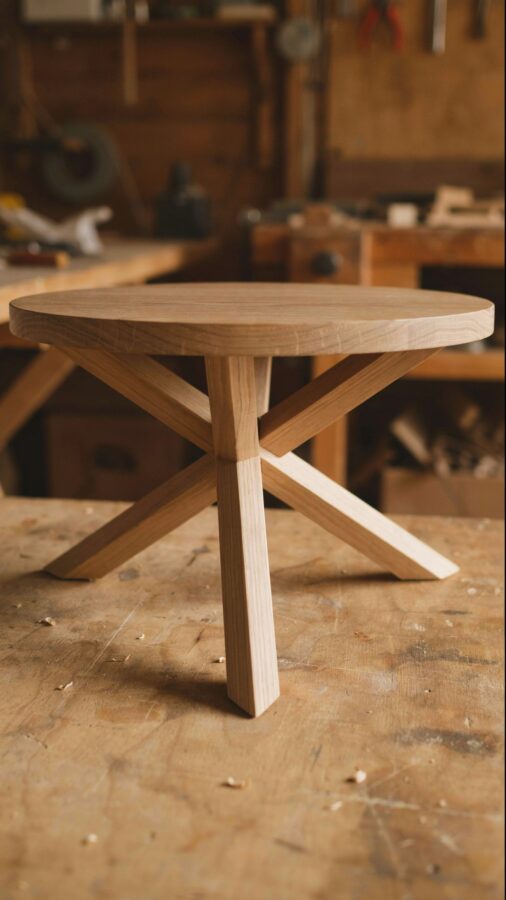
Building simple wooden table legs is one of the most rewarding steps you can take in beginner woodworking. The three stick design I am about to show you uses just three pieces of wood per leg, creating a clean minimalist look that supports a tabletop without distracting from it. If you have ever wanted to make your own furniture but felt intimidated by complicated joinery or expensive tools, this project is for you. It is budget friendly, requires only basic equipment, and the result is a sturdy leg set that you can attach to a small side table, a coffee table, or even a workbench. I have built several versions of these legs over the years, and the three stick method remains my favorite because it balances strength, simplicity, and aesthetic. Let me walk you through exactly how to do it.
Why Choose a Three Stick Design for Table Legs
The three stick design is not just about saving money on lumber. It also creates a stable tripod effect that resists wobbling better than many four leg systems when the floor is uneven. Each leg consists of three vertical sticks arranged in a triangular pattern, connected at the top by a simple crosspiece or a mounting plate. This configuration uses less wood than a solid block leg, making it lighter and easier to move. For a beginner woodworker, it also means fewer cuts and less precision required. The gaps between the sticks add an airy, modern look that pairs well with both rustic and contemporary tabletops. I have used this design for a dining bench and a nightstand, and both have held up for years without any sagging.
Materials and Tools You Need for This Woodworking Project
Before you start, gather your materials. You can find everything at a local hardware store or a big box retailer for under twenty dollars. For a set of four table legs, you will need around eight feet of 2×2 lumber. This size is easy to cut and sand, and it provides enough strength for most small to medium tables. You can use pine, poplar, or even oak if you want a harder wood. Avoid construction grade lumber that is still wet; go for kiln dried stock to prevent warping.
- Eight feet of 2×2 lumber (or twelve feet if you plan for extra length)
- Wood glue (a good grade like Titebond II)
- One inch wood screws (for attaching the legs to a tabletop)
- A miter saw or a hand saw with a miter box
- A drill with a screwdriver bit
- Sandpaper (80, 120, and 220 grit)
- A measuring tape and a pencil
That is really all you need. No pocket hole jig or doweling kit is required, though you can use either if you prefer a hidden joinery look. For this guide I will keep it simple with glue and screws.
Step by Step: How to Cut and Prepare Your Wooden Sticks
Start by cutting your 2×2 lumber into twelve equal pieces, three pieces for each leg. For a standard table height of about twenty nine inches, cut each stick to twenty eight and a half inches. That extra half inch allows for a small gap under the tabletop or for attaching a mounting block. Use a miter saw for clean square cuts. If you do not have a miter saw, a hand saw with a miter box works fine, just take your time to keep the cuts straight. After cutting, label each set of three sticks with a piece of tape so they stay together. Sand each stick with 80 grit sandpaper first to remove rough spots, then move to 120 grit, and finish with 220 grit for a smooth surface. Wipe off the dust with a damp cloth before moving to assembly.
One tip I learned the hard way: sand the ends of the sticks too, especially the tops that will contact the tabletop. Rough ends can make the table sit unevenly and scratch the underside of your table. Take five extra minutes to do this properly.
Assembling the Three Stick Legs for Sturdy Support
To assemble each leg, lay three sticks flat on your work surface side by side with about a quarter inch gap between them. The gap lets you see through the leg, which is part of the minimalist look. Now you need a way to hold those three sticks together at the top. I use a small square of plywood or a strip of hardwood cut to about three inches long and one inch wide. Place this block across the tops of the three sticks, centered, and mark where the screws will go. Apply a thin line of wood glue to the contact area, then drill pilot holes to prevent splitting. Screw the block into each of the three sticks using one inch
#woodworking #woodworker #woodenlegs #woodentablelegs #woodwork
Leave a Comment