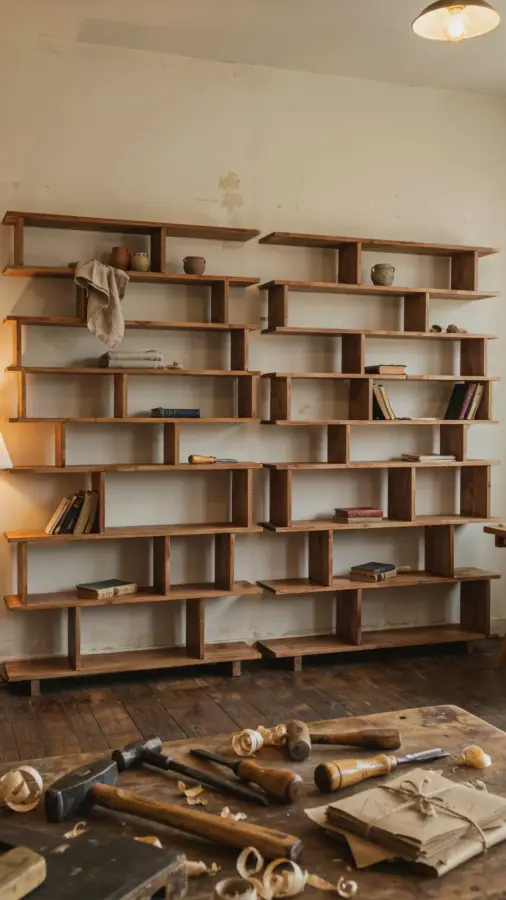
I never thought I could build my own bookshelf until I discovered this super easy modular bookshelf project. Honest. I had zero woodworking experience, barely knew how to use a drill, and my only previous DIY attempt ended with a crooked picture frame. But this build changed everything. The concept is simple: you make individual boxes that stack and connect. You can rearrange them however you want. It took me one Saturday afternoon, and I still can’t believe how good it looks in my living room. If you have basic tools and a little patience, you can do this too.
Why a Modular Bookshelf Beats Store-Bought Options
Store-bought bookshelves are fine, but they are rarely perfect. They are either too tall, too short, or the wrong color. With a modular bookshelf, you build exactly what your space needs. Ok so think about it: you get to decide how wide each section is, how tall the whole unit goes, and whether you want open cubbies or closed storage (just add a back panel if you want).
Here’s the thing: if you move to a new apartment or just want a different layout, you can take it apart and rebuild. That’s a huge advantage. You don’t need to buy a whole new bookshelf. Plus, the look is custom. People will think you paid a carpenter. Not gonna lie, that feels good.
I also like that you can make it as deep or as shallow as you want. My books are mostly paperbacks, so I made my boxes 11 inches deep. But if you have massive coffee table books or vinyl records, you could go 14 inches. Your call entirely.
Materials and Tools You Actually Need (No Surprises)
Let’s keep this beginner-friendly. You do not need a table saw or a router. I used a circular saw and a drill. That’s it. Here is what I bought for a unit that holds about 60 books across four boxes:
- One sheet of 3/4-inch plywood (I used birch, but sanded pine works too and costs less)
- Wood glue (Titebond II is my go-to)
- 1 1/4-inch pocket hole screws (you will need a Kreg jig or a cheap knockoff)
- Sandpaper in 80, 120, and 220 grit
- Paint or stain of your choice (I used a matte black paint, and honestly the imperfections just look like character)
- A cheap foam roller and a brush for corners
Tools: circular saw, drill, pocket hole jig, clamps (at least four), tape measure, speed square. That is genuinely everything. Oh and a pencil. I forgot my pencil halfway through and used a crayon. Worked fine.
One mildly odd personal detail: I almost burned my hot glue gun once because I left it on overnight. Not recommended. But this build does not use hot glue, so you are safe.
Step by Step: Building the Boxes (the Simple Way)
Cut your plywood into pieces. For each box, you need two side pieces and two top/bottom pieces (same length). I made my boxes 19 inches wide, 11 inches deep, and 13 inches tall. That fit my books nicely. But you can change those numbers. The math is simple: for a square box, side pieces are your chosen height, top/bottom are your chosen width.
Drill pocket holes in the side pieces. Put one hole near each end. Then glue the edges and screw everything together. Use clamps while the glue dries. That is it. One box takes maybe 20 minutes. I built four boxes in an afternoon, including sanding and cleanup.
Wait, here is a rambling thought: I tried to sand too fast and rounded the corners accidentally. That actually looked cool, like midcentury furniture. So if you mess up, just lean into it. Nobody is inspecting your shelves with a level and a micrometer. It’s storage, not brain surgery.
After the boxes are assembled, sand everything smooth. Start with 80 grit if there are rough edges, then 120, then 220. Use a tack cloth to wipe off the dust before finishing.
The Best Part: Arranging Your Modules
Now the fun part. Stack the boxes however you like. One tall tower. A row of two, then a row of two stacked. A zigzag. I prefer an asymmetrical layout with one box lying on its side as a horizontal cubby. It breaks up the grid and gives you a place to put a plant or a framed photo.
You can connect the boxes using a few small screws through the top of one box into the bottom of the one above. But honestly, I just stack them. Gravity works. If you have kids or earthquake concerns, add a little bracket to the wall at the top. That is cheap insurance.
I have seen people use these modules as room dividers, nightstands, TV stands, and even a cat shelf (my cat loves the top box). The modular design means you can change the layout seasonally, when you redecorate, or just because you are bored. That flexibility is priceless.
Customizing Your Build (Paint, Stain, or Leave Raw)
This is where you make it your own. I painted mine matte black because my walls are light gray and I wanted contrast. But a friend used a dark walnut stain, and it looks like a designer piece. You can also leave the birch plywood raw and just apply a clear polyurethane. That gives a Scandinavian, clean look.
Here is a trick: before you assemble the boxes, paint or stain the inside of the plywood. It is much easier to reach the corners when the box is flat. After assembly, you only need to touch up the edges. Saves time and frustration.
If you want to get fancy, add a back panel. Cut a thin piece of plywood or MDF to the size of the box opening and nail it on. That gives you a solid back so things do not fall through. I did not add backs because I like the open look. But for a closed cabinet feel, go for it. You could even use patterned paper or fabric on the back for a surprise pop of color.
Common Mistakes That Beginners Make (Learn From Mine)
I made plenty of mistakes so you do not have to. First: measure twice, cut once. I know it is a cliché, but I ended up with one box that was a quarter inch too narrow because I read the tape wrong. It still works, but the books are a little tight.
Second: do not skip sanding. Rough edges catch on your sleeves and look sloppy. Spend the extra ten minutes.
Third: pocket holes need to be on the inside of the box, not the outside. I put one on the wrong side and had to fill the hole with wood putty. It is hidden now, but I know it is there. And it bugs me.
Fourth: use wood glue. I know it is tempting to just screw things together, but glue makes the joint rock solid. Without glue, the screws could loosen over time as the wood expands and contracts. I learned this the hard way with a cheap bookshelf I built years ago that wobbled. This one does not wobble.
Anyway, the whole point is that this is forgiving. If you mess up a cut, you can trim it down and use it for a smaller box. If you screw a pocket hole in the wrong face, paint covers it. This is not fine furniture. It is practical, functional storage that you made with your own hands.
Where to Put Your New Modular Bookshelf
I put mine in the living room next to the sofa. It holds my current reads, a couple of plants, and a small lamp. But this design works everywhere. A tall stack in a hallway makes a great entryway catch-all. A low row of two boxes under a window becomes a window seat with storage underneath. Or build five boxes and make a full wall unit behind your desk.
The best part is that you can start small and add more boxes later. I built four boxes, but I plan to build two more to fill the gap next to my TV stand. Because it is modular, I just stack them on the existing build. No rethinking required. Look, I am not a planner. I like to make decisions as I go. This project lets you do exactly that.
So if you want a bookshelf that is truly yours, that fits your space, your style, and your skill level, give this a try. Grab a sheet of plywood, a cheap pocket hole jig, and an afternoon. You will surprise yourself. And if you build one, I would love to hear about your layout. Drop a comment below or tag me on Pinterest with your build. Let’s see those modular creations.
#bookshelf #designideas #woodworking #diy #modular
Leave a Comment