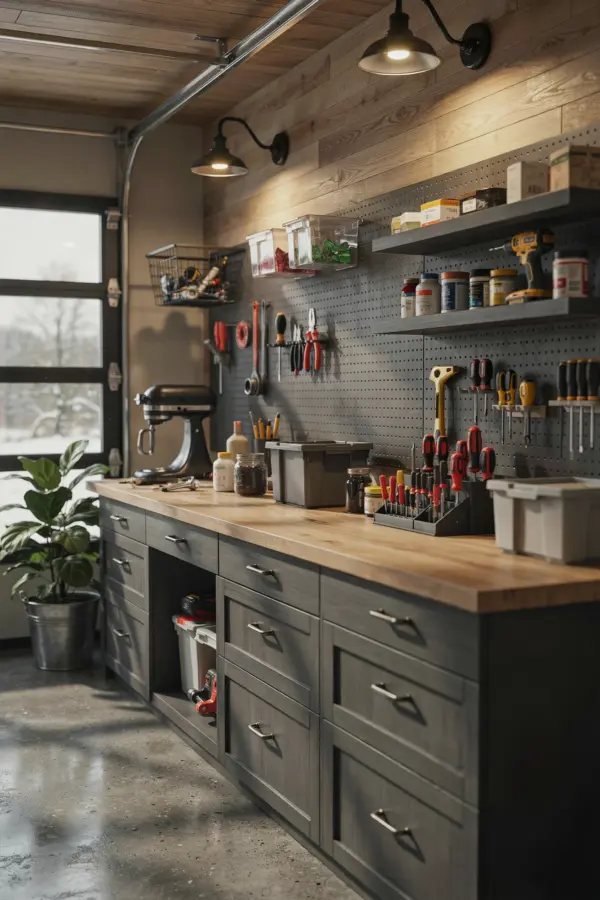
If you are like me, your workshop started out with the best intentions. A pegboard here, a shelf there, and a vague plan to “organize later.” But then the later never came, and now your woodworking space is a battlefield of scattered chisels, tangled cords, and half-empty coffee cups. I have made every mistake in the book when it comes to workshop tool storage ideas, and I am here to spare you the headache. Let us walk through the most common blunders and how to fix them so you can finally have a clutter-free workshop that actually works for you.
Mistake 1: Buying Storage Before You Know What You Own
I once bought a massive rolling tool chest because it was on sale. My mistake was that I had no idea what tools I actually needed to store. The chest sat half empty for months, taking up precious floor space. Do not make this error.
Before you spend a dime on any storage system, take an honest inventory of your tools. Group them by type: measuring tools, hand saws, chisels, power tools, sandpaper, and fasteners. Count duplicates, measure your longest tools, and note which ones you use daily versus once a year. This simple audit will stop you from buying bins that are too shallow or drawers that are too narrow.
A practical tip: use a notepad or a spreadsheet. List every tool and its approximate size. That list becomes your roadmap for everything from pegboard layouts to custom drawer inserts.
Mistake 2: Ignoring Vertical Space (The Wall Is Your Best Friend)
Too many woodworkers fill their benches and floors with tools because they forget about the walls. The floor of a workshop should be for walking and standing, not for storing a stack of clamps or a pile of sanding blocks.
Pegboard layouts are a classic solution, but only if you install them correctly. I screwed my pegboard directly into drywall without furring strips. The pegs wobbled, and heavy tools bent the board. Instead, use a 1×2 or 1×3 frame behind the pegboard to create an air gap. That gap lets you use longer hooks and keeps the board rigid. Magnetic strips are also fantastic for wrenches, screwdrivers, and chisels, but do not overload a single strip with heavy pliers or hammers. Use multiple strips spaced a foot apart.
A few wall storage wins that saved my workshop:
- French cleat systems for bulky power tools like circular saws or sanders. You can build custom hanging blocks and rearrange them in seconds.
- Magnetic tool bars fixed inside shallow cabinets for quick access to frequently used bits and drivers.
- Pegboard tool holders for long items like levels, rulers, and clamps. Just make sure your hooks are made for the specific tool weight.
Mistake 3: Storing Tools in Closed Boxes (Out of Sight, Out of Mind)
I am guilty of this one. I bought a stack of opaque plastic totes and tossed all my sanding discs, router bits, and small hardware into them. Yes, the workshop looked neater. But every time I needed a specific grit or a 1/4 inch bit, I had to dump the entire tote onto my bench. That is not organization. That is a treasure hunt.
Instead, use transparent containers or open-front bins for items you grab frequently. For small parts like screws, washers, and drill bits, try clear compartment boxes mounted on a wall or stored in a drawer. Label every bin on three sides: front, top, and side. That way you see the label from any angle, no matter where the bin is on a shelf.
Custom drawer inserts are another game changer. You can make them from scrap plywood or foam board. Cut slots for individual chisels, wrenches, or pliers. When every tool has its own snug spot, you know immediately when something is missing, and you never waste time rummaging.
Mistake 4: Forgetting the “Use Zone” When Planning Layout
I used to store my table saw blade wrenches on a pegboard that was three steps away from the saw. That seems minor until you make thirty cuts in a row. Every time you walk away from your primary workstation to grab a tool, you lose momentum. Over a long project, that adds up to hours of wasted time.
Think of your workshop in zones. Your main workbench zone should store the tools you reach for most: measuring tape, square, hammer, utility knife, pencil, and small screwdrivers. Your sawing zone can hold clamps, push sticks, and blade wrenches right next to the saw. Your sanding zone gets sandpaper, block, and dust mask stored within arm’s reach of the sander.
A good rule of thumb: if you use a tool more than three times in a single session, it needs to live within an arm’s reach of where you use it. If you use it once a month, it can go on a higher shelf or in a less accessible drawer.
Mistake 5: Overlooking Mobile Storage for Large Power Tools
My planer used to sit in a corner. To move it to the bench, I had to lift it (ouch) and then find a surface. That got old fast. I finally built a simple mobile base from two 2x4s and four locking casters. Now my planer rolls under the bench when not in use and comes out in seconds.
Think about any heavy tool that you do not use every single day. A compound miter saw, a floor-standing drill press, or a band saw. Mobile bases let you rearrange your workspace on the fly. You can pull the tool to an open area for a big cut and then tuck it away when you need the floor space for assembly. Add a shallow shelf or drawer to the base for accessories, blades, or wrenches that belong to that tool.
If you are short on space, consider a rolling tool
#workshoporganization #toolstorageideas #woodworkingtips #diyworkshop #clutterfreeworkshop
Leave a Comment